
If you are using WordPress to build your Landing page for your Online Travel Business, Contact Form 7 plugin is an excellent choice when it comes to creating the Contact-form to capture Leads and Enquiries.
Contact Form 7 can manage multiple contact forms, plus you can customize the form and the mail contents flexibly with simple markup. The form supports Ajax-powered submitting, CAPTCHA, Akismet spam filtering and so on.
— Plugin Page
When using Sembark Travel CRM, you can easily connect your WordPress powered landing page(s) to Sembark REST APIs using Contact Form to Any API plugin. This plugin enhances the existing Contact Form 7 plugin, allowing you to send contact-form data to any REST api. Using this, you can manage all your landing page conversion in your Sembark Dashboard.
Integration Setup
Now let’s see the steps involved in the integration process.
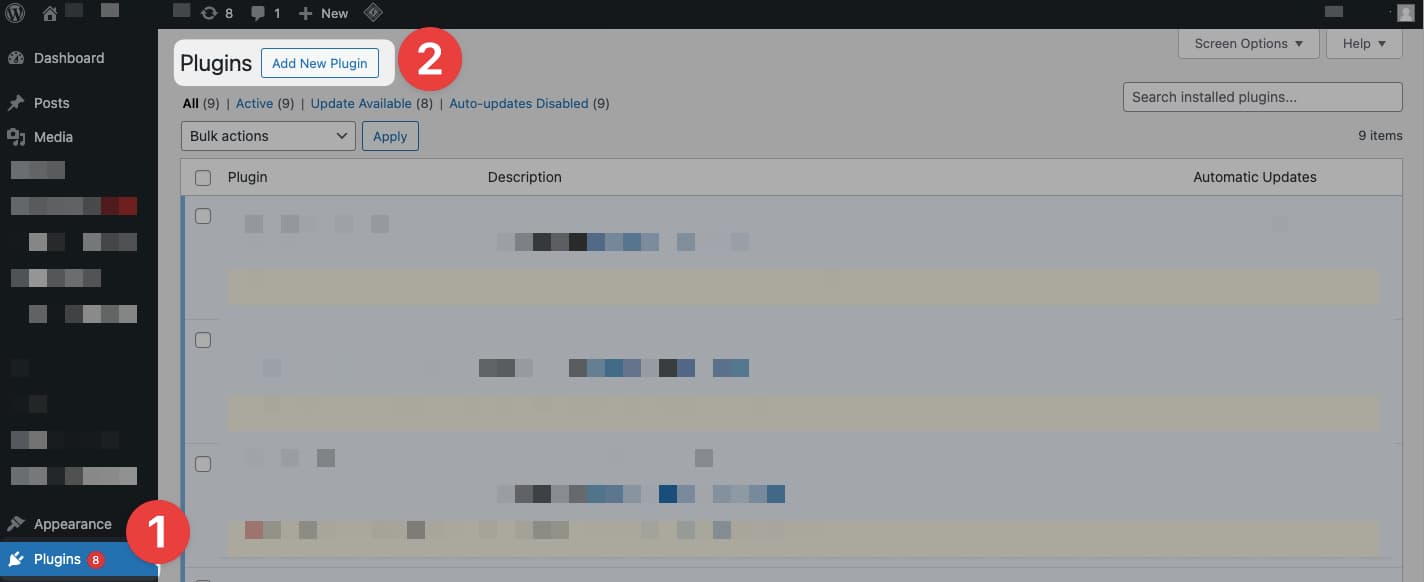
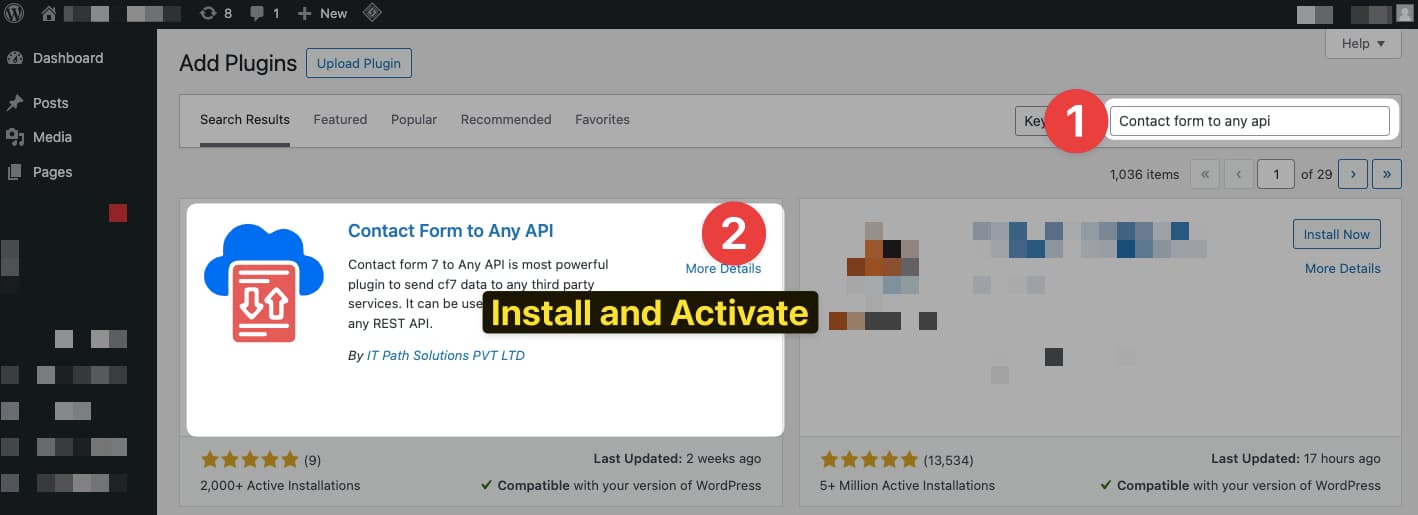
1. Install Plugin
Please visit the documentation page for Contact Form to Any API WordPress Plugin and follow the installation instructions. After installation and activation, you will “CF7 to Any API” menu in your WordPress admin screen.
2. Generate Access Token
All Sembark APIs are protected and require an Access Token for every communication. You can generate an Access Token from your Sembark Dashboard. Please visit Organization > Settings > Integration > New Integration and create a new integration with an appropriate Name (e.g. WebsiteXYZ) and Description (e.g. Landing page). After successful creation, your will be prompted with the Access Token. We will use this in the next step.
DANGER
You MUST NEVER share your Sembark API Access Tokens over untrusted channel or publicly. If someone gets the token, they can call APIs and abuse/spam your API Usage.
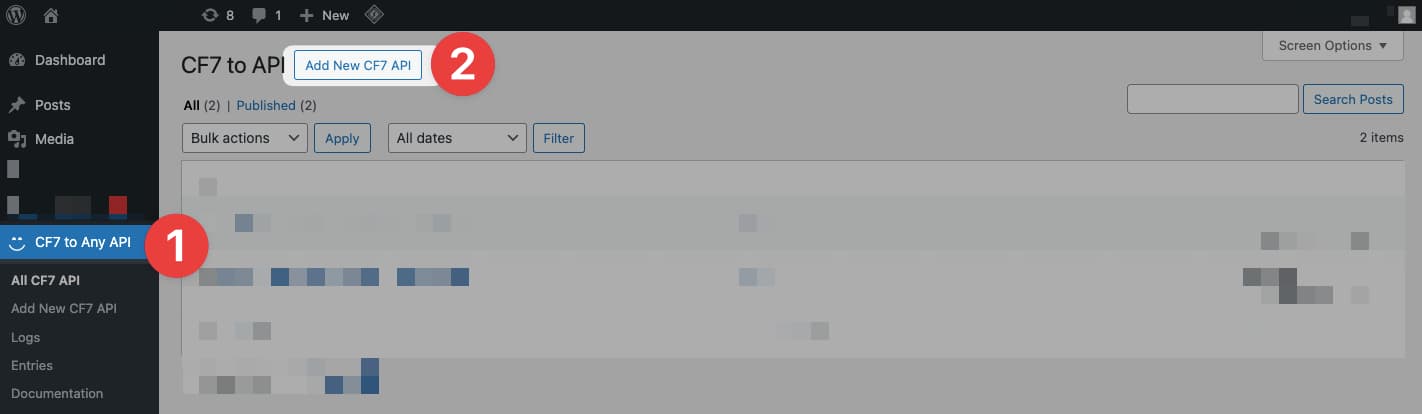
3. Add Contact Form API
From your CF7 to Any API plugin menu of your WordPress Admin dashboard, click on Add new CF7 API. This will open a page to add the necessary details for our integration.
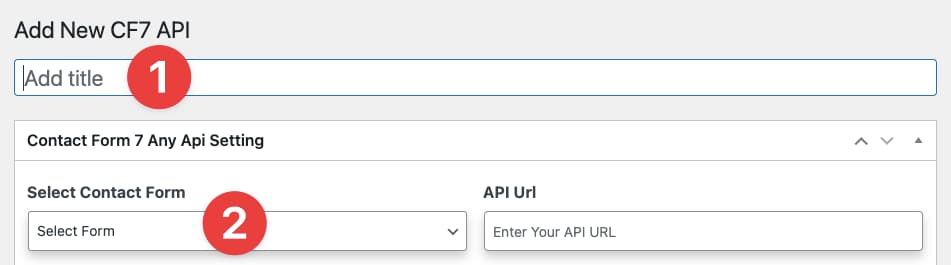
a. Basic Setup
- Given a name to your integration e.g. Sembark Leads API
- Now select your
Contact Formthat you are using on your landing pages and want to connect to Sembark
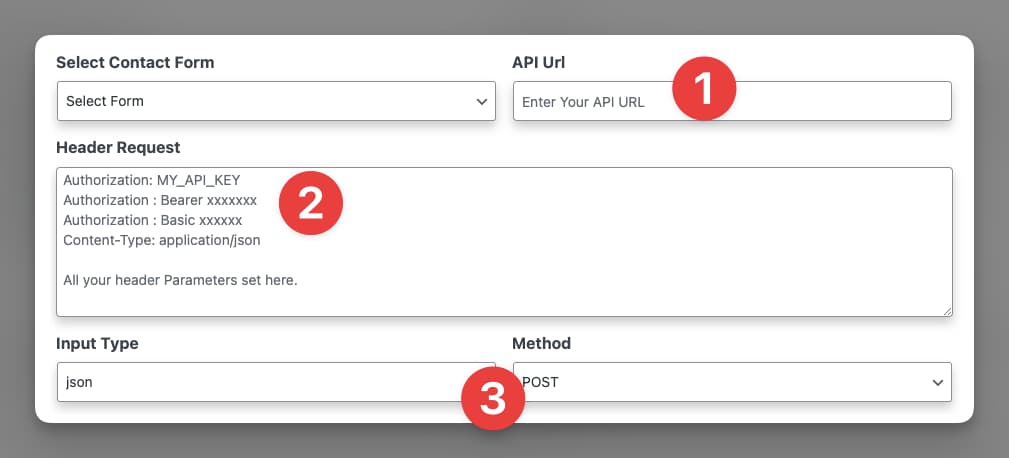
b. Endpoint Authentication
-
Next, add the respective Sembark REST API url. For leads or enquiries integration, we will use
https://api.sembark.com/integrations/v1/trip-plan-requests -
Now we will set some required headers to access the APIs.
Authorization: Bearer <TOKEN_HERE>
Accept: application/json
Content-Type: application/json
We will replace the
<TOKEN_HERE>with the access token from Sembark Dashboard. Simply the copy the access token generated in the previous step or click on Generate New Token from the same integration. Copy the token and put that inplace of<TOKEN_HERE> -
Next we will ensure the
Input Typeis set tojsonandMethodis set toPOST.
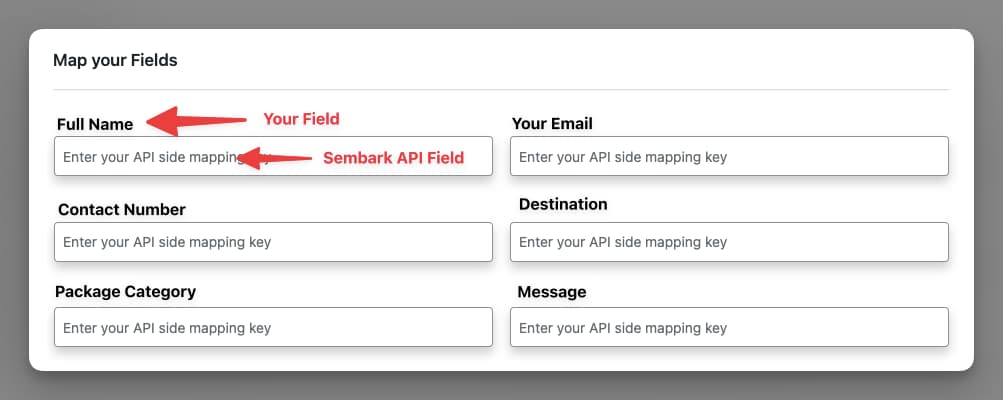
c. Fields Mapping
Now the final step is to map your Contact Form fields to Sembark API fields. You should see some input fields with Labels (e.g. First Name, Last Name, Email etc.) from your contact-form. We will map these fields to the fields expected by Sembark APIs.
What is Mapping
Mapping is associating or connecting each field of (a set) with a field of another set. In this case, we will associate field(s) from your contact-form (set) to field(s) of Sembark APIs (another set).
Sembark APIsaccept data in particular key-value format. Incase of Leads API, following fields are available. For an up-to-date information of fields, please visit the respective APIs documentation page.
{
  name: string; // Guest Name, required (max: 191)
  phone_number: string; // Guest Phone Number, required (max: 191)
}
Now assuming you have following fields in your Contact Form and you want to send them to Sembark Leads API.
- Name
- Contact Number
- Destination
- Package Category
- Message
Now we will map these Contact Form’s fields to appropriate available fields in Sembark Leads API.
| Contact Form Field | Sembark Field |
|---|---|
| Name | name |
| Contact Number | phone_number |
| Destination | destination |
| Message | comments |
| Package Category | Package Category |
We will put these Sembark Fields in the mapping inputs of your contact-form fields respectively. As you can see, Package Category is set to the same name as it doesn’t have a corresponding field in the Sembark API but the API will capture this detail and show to you in your dashboard.
d. Save and Publish
With the above configuration in place, you can now save these details and publish it in your WordPress Admin dashboard.
4. Let’s Test
We are now ready to test the above integration. Visit your landing page and fill some enquiry form and submit. On you WordPress Admin dashboard, click on CF7 to Any API plugin menu and open the Logs. You should see log entry from your last submission. Also check the API Response column the log entries table in the same page and ensure the you receiving success responses.
These submissions will be available in Sembark Dashboard. For leads, please visit Trips > Trip Plan Requests to checkout the submissions. Here you will see your leads, with each of your sources. You can add Tags, assign Sales Person and create a query to provide quotations.
Troubleshooting
If you are not receiving a success response, then you might have some misconfiguration in your integration.
Unauthorized - 401
If you are receiving an unauthorized response with 401 status code, then it mean there are some issue with the Access Token or the way you are sending it in the headers.
- Ensure that access token is correct. When in doubt, delete and generate a new access token for your Integration from your Sembark Dashboard.
- When replacing
<TOKEN_HERE>, these two angle brackets must be removed as well. - Check for spelling and formatting of Headers in the
CF7 APIform. Ensure that everything is according the steps mentioned above.
Invalid Request Data - 422
If you are receiving Unprocessable entity or Invalid Request Data with 422 status code, then there are some issue with the API request data fields.
- Too Long Data: some fields such as
name,emailetc has a character limit of maximum number of allowed characters - Invalid Email: some fields have validation for it’s type such as email
- Required Fields: some fields such as
name,phone_numberandtrip_sourceare required for Leads API
To understand Sembark API responses in details, please visit the documentation page for more details.
Frequently Asked Questions
Here are the frequently asked questions during integration between WordPress Contact Form and Sembark APIs
Add Missing Required Field
Q. A Field is required in Sembark APis, but I don’t have a field in my Contact Form for it ?
You can easily add a hidden field to your Contact-Forms. Hidden fields are a great way to attach crucial information to your contact-forms without explicitly asking customer. For example, we can add a hidden field for the destination and update’s it when a visiter click on a particular package or visits a destination’s page. You can also define a default value for your hidden fields. Checkout the hidden field documentation for more details.
[hidden destination default:"Manali"]
// NOTE: Update the default value to appropriate value
Once you have added a hidden field, you can then map it to respective field in the Sembark API in the CF7 API form as explained above.